IRAN ART EXHIBITION: MAKE A CLAY DOLL BY 10 BASIC STEPS
Who doesn’t love dolls? They’re fun to play with and they come in a million different varieties. If you want to have your own personal doll, why not make one yourself out of clay? This gives you a great chance to get creative and make something that’s perfect for you.
Steps
1. Find a model. You’ll want a drawing or a photo of a doll body that you want to replicate. Clay dolls work best if making a Barbie-sized doll or smaller. You can draw the general shape that you want for your doll, or you can print out a picture of what you want. Don’t take on anything too complicated as a beginner.
2. Make the frame. Cut all the fur off of a pipe cleaner. Trim the wires until they are just about a centimeter longer than each section of the body. You’ll need wire pieces for the upper and lower arms, the upper and lower legs, the feet, the hands, the head, the chest and the hips. The final three pieces will need to be in a circle shape, with straight sections coming down where a connection will need to be made.
• The head, if you want a good size neck, will need an extra long section of straight wire. It should be at least 2 centimeters (0.8 in) long.
3. Pad the frame. You don’t want to make the doll too heavy and waste a bunch of clay, so pad the frame with a cheap material. Paper mache, aluminium foil, and tape are the most common materials. Place your material by wrapping it around the wire frame, making the “muscles” of the figure. Make sure to leave the extra wire uncovered, as this will be used to make the joints. When done, it should look a little like a snow man in its level of detail.
4. Add the clay. Roughly cover all of the padded area with clay. Only worry about getting the major shapes at first. The finer details can be made later. If using an air-dry clay, work on only one body part at a time, since you don’t want to lose the softness of the clay.
• Study how muscle groups look and work if you want to get better at this. This will make for a more realistic looking doll. For example, real legs don’t look like tubes: they’re curved because under the skin there are actually lots and lots of different shapes that just get covered up.
5. Sculpt the details. Start adding more clay and carving other parts away to create details like eyes, nose, mouth, fingers, etc. You can use all sorts of household tools to carve the clay, like toothpicks, utility knives, empty pens, and other items.
• Generally, the areas where there should be a hole (like a mouth) should be cut away to make the rough shape. Areas that stick out (like a nose) should be shaped roughly as a separate piece and then added on. Use your finger or a tool to smooth the clay and make the additions and subtractions transition in a way that looks natural.
• Any general changes in topography (like cheek bones) might be able to be created by shifting the existing material, but they may also require new material to be laid down. Just make the transition as smooth as you can.
• If you use Sculpey clay, you can use liquid Sculpey to smooth transitions and create details, but realize that you’ll have to deal with changes in the curing and coloring process.
6. Cure the clay. Cure the clay as described by the clay’s manufacturer. It may need to be baked, air dry, or other curing method.
• For air drying, 2 or more hours are often needed for the clay to cure completely.
• A general rule of thumb with oven baking clay is to cook it for longer at a lower temperature than what is recommended by the manufacturer. This reduces the chance of burning.
• Some clays will require a kiln in order to cure them. This is standard for traditional clays. You may be able to rent time with a local commercial kiln if you do not own one, but you should take this into account when you choose your clay.
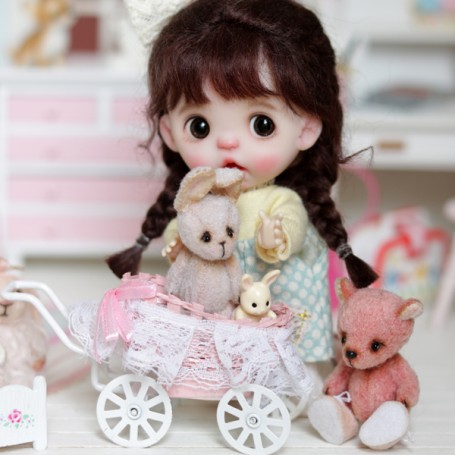
7. Paint details. Using model enamel paints or nail polish (for polymer clay) or acrylic paints (if using other types of clay), you can paint details like the eyes and mouth, to get a more life-like appearance. Let the paint dry after you’re done, before going on to anything else.
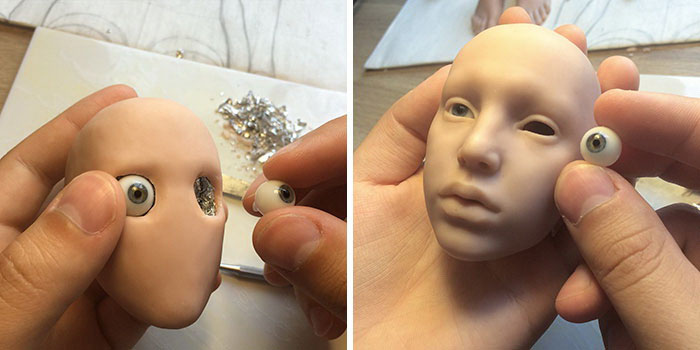
• If you want to avoid the difficulty of painting the eyes, you can cheat and use plastic doll eyes, which are embedded in the clay of the head and then a clay “eyelid” placed over them to keep them in place and make them look realistic.
• You can if you want to add just a little, faint color, you can use watercolor and sealant or you can even apply makeup to the doll.
• Avoid using the color black for details like the mouth. Real faces don’t have the color black at the line of the mouth, so your doll shouldn’t either. Go for softer shades, like dark brown or pink.
8. Add hair. Take scraps of long-haired sheepskin or any real or faux fur with the “skin” still attached. Cut the skin part to form four pieces that recreate the shape of the head. Usually this will mean a square for the top and a rectangle for the back, with C-ish shaped pieces for the sides. Once you have the pieces cut, sew them together to create a wig that can be placed or glued onto your doll’s head.
9. Attach the parts together. Start wrapping the exposed wire ends to connect the body parts together. Doing the joints in this way should allow the joints to remain flexible. Cover the joints with a rubber band if they will show and you don’t want to risk injury.
10. Dress the doll. Now that the doll is completely assembled, you can dress them as you see fit! Use premade doll clothes or make your own! If you want to use premade doll clothes, make sure your doll is the same size as standard dolls before you make her.
IRAN ART EXHIBITION: Making your own may, in many ways, be easier.
• Clothes that cover the joints are desirable, as this will hide cosmetic problems.
