IRAN ART EXHIBITION: YOU CAN PRESERVE FLOWERS IN RESIN AT HOME
Casting resin can be used for all kinds of purposes, including preserving flowers. Preserving flowers in resin is a great way to enjoy the beauty of a flower for many years. The clear resin is used to protect the flower, and display it through all kinds of objects and functions. Interested in preserving flowers in resin yourself? This is an incredibly rewarding craft that can easily be done at home. Follow our easy guide on preserving flowers in resin below. Once you get started, you will be hooked!
What to Use Preserved Flowers For
So, what can you use flowers in resin for? Preserving flowers in resin can be done for a wide variety of crafts and creative projects. Basically, any type of resin molding or resin object that you make can be enhanced with flowers set inside them. Some popular examples of resin flower castings include:
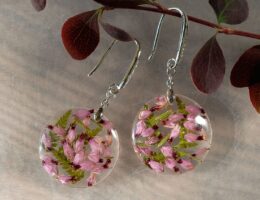
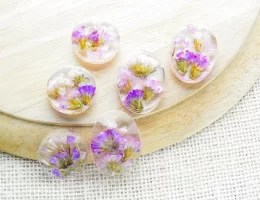
• Resin jewelry with flowers inside the pieces
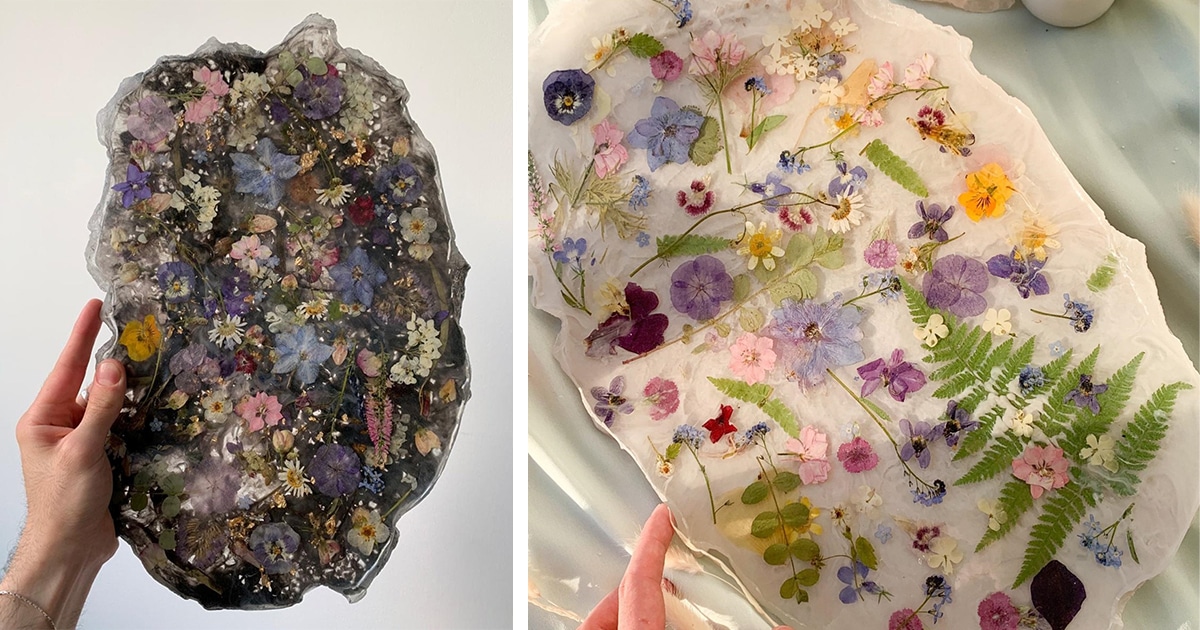
• Resin coasters with flowers in them
• Resin tabletops or counters with flowers preserved in them
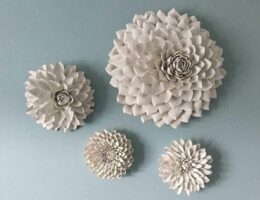
• Simple resin flower decorations
• Preserving flowers in resin lamps
• Any other type of clear cast resin object
Materials Needed for Flowers in Resin
Luckily, preserving flowers in resin is something that can easily be done at home. If you are interested in DIY and crafting, then resin flowers may just become your new favorite technique. In order to preserve flowers in resin, you will need a few basic tools and materials. These are all fairly simple items and are not difficult to come by. When learning how to preserve flowers in resin, make sure that you have all of these materials ready before getting started. For preserving flowers in resin, you will need:
• Suitable flowers (preferably dried)
• Clear pourable casting resin
• Molds for your casting (we recommend using silicone molds as they are easier to release)
• A resin release agent to help the dried resin object come out of its mold
• Latex/protective rubber gloves
• A respirator mask
• Safety goggles
• Plastic cups for mixing the resin
• Wooden stirring sticks
• A hairdryer or blowtorch to remove bubbles
• Toothpicks or skewer sticks to remove bubbles
• You may also want a pressure pot for curing the resin. This can be very useful, but it is optional
Our Casting Resin Recommendation: INCREDIBLE SOLUTIONS Pourable Plastic Clear Casting Resin
You cant preserve resin flowers without an effective casting resin. This option is our favorite choice thanks to its ideal consistency for creating deep pours and molded casts. The two-part plastic casting resin mixes together to form a total of 1.5 gallons. This is easily mixed in a 2:1 ratio. The resin is designed for 2” thick deep pours, so it can be used to create all kinds of objects.
To make this casting resin better to work with, it has a low exotherm and low viscosity formula. This means that it pours really well for thick molds, and creates minimal bubbles. To make the resin even easier to use, the formula offers long working times once the two parts are mixed together. When cured, the resin also offers minimal shrinkage.
Besides its user-friendly formula, we chose this resin for preserving flowers thanks to its superior level of clarity. The resin is enhanced with added UV inhibitors to stop it from yellowing over time which allows you to enjoy a long-lasting, perfectly clear cast object.
Different Kinds of Dried Flowers
When creating your own resin castings, the flowers that you choose will make an enormous difference. This is one of the most important aspects of preserving flowers in resin, so you need to make sure that you choose the correct flowers. If you use the wrong flowers, then casting will not last very long, and the flower may start to ruin your item. There are three different choices when selecting dried flowers for resin castings.
Real Dried Flowers Bought Online
IRAN ART EXHIBITION: You can buy packs of readily dried flowers online. This is one of the easiest things to do, as all the work in drying the flowers has already been done. These flowers will be completely and properly dried already. They will be ready to use, and safe for resin castings. Unfortunately, choosing pre-dried flowers may limit the types of flowers that you can work with. However, going this route gives you peace of mind knowing that the flowers have been professionally dried.
Artificial Flowers
Another option is to use artificial flowers. This is a good choice because it allows you to cast the flower without any risk of the flower decaying or affecting the resin. This will last the longest. Artificial flowers also allow you to use the appearance of a bright and completely fresh flower – you cant cast fresh natural flowers. When cast, you often can’t tell that it is an artificial flower. Of course, many people are picky about this and would rather choose a natural flower because they don’t enjoy the idea or the look of a fake flower.
Dry Your Own Flowers
You can also pick and dry your own flowers for casting in resin. The benefit of this is that you can choose the exact flower that you want to cast. It also allows you to save money from buying flowers, and you get the satisfaction of knowing that you did the entire process yourself. The downside is that drying your own flowers takes quite a bit of time and effort. You also need to make sure that you dry the flowers completely in order to get great results in your resin casting.
Drying Flowers Yourself
When casting flowers in resin, using dried flowers is preferred in order to avoid the flower from decomposing after it has been cast. Preserving fresh flowers may look great, but there is the risk of the flower releasing moisture and turning brown while it is inside the resin. If you plan on drying your flowers before casting, here are a few steps to take:
Pressing the Flowers in a Book
One of the most common methods for preserving flowers is to press them between the pages of a book. This may be something that you remember from childhood art projects, and it is something that can easily be achieved at home. All you need is a thick, heavy book and your flowers.
The process is really simple. Take your fresh flower and lay it down over the page of a book. You will need to make sure that the book provides enough pressure to press down on the flower, so you should place it halfway through a thick, heavy book. Lay out the petals carefully with no folds or crumples in the flower. Then all you need to do is press the book closed and leave it to flatten and dry out.
Applying more pressure is a good idea, so you can stack weighted objects on top of the book if you want. You should leave the flower for about two to three weeks for it to dry properly. The idea is that the book flattens the flower, and pushes out its moisture while keeping the coloring of the flower. The closed book keeps the flower airtight and away from exposure to oxygen. This is important for keeping the coloring of the flower, so don’t open the book while it dries. Once the flower is hard and dry, you can use it for casting.

Drying the Flowers in Silica Gel
You can also dry flowers at home using silica gel. Start by picking your chosen flowers. Make sure that they do not have any moisture on them before drying them. Fill the bottom art of a container with silica gel. The layer should be around 1” in thickness. This gel is made up of very small silica gel beads that soak up any moisture.
IRAN ART EXHIBITION: When the flowers are trimmed and ready, place them upright in the silica gel. Then very gently cover the flowers completely with silica gel. Do this with great care, as you do not want to bruise or break apart any petals. Slowly cover up the flowers until there are no more petals exposed. Then close the airtight container with a lid and leave it for about 6 – 8 days.
Then you can open the container and very carefully remove the dried flowers. These should be hard and fully dried now, while still maintaining their color. Gently brush or shake off any remaining silica crystals. This is one of the fastest and most efficient ways of preserving flowers at home.
Hanging Them Up to Dry
An easy preservation method is simply hanging the flowers up to dry. This needs to be done in a dark and very dry area that has a good flow of air and ventilation. Attics are a good choice. Tie a rope or piece of string between two points to create a kind of washing line for your flowers. This should be tight.
Then take your flowers, this could be in bunches or individual flowers. Tie the ends of the stalks to the “washing line” string so that the flowers hang upside down. Once they are secured, close the door and leave the flowers for about three weeks. When you come back, then should be dried and ready to use.
Microwave Flower Press
Using a microwave to dry flowers is the fastest method available. This may intimidate some, but it is actually really simple to do. Take your flower petals or whole flowers, and lay them flat on a piece of paper. Fold the paper over the top of the flower (as if you were drying the flowers in a book). Then cover the paper with a piece of kitchen towel and place this in a microwave, USE a weight to press down on top of the flower. A glass is a good option.
Then all you need to do is run the microwave in 10-second bursts until the flower is dried out. Be careful here, because running the microwave for too long can burn and blacken the flower. It may take a bit of experimenting to find the right amount of time, but when you get it right, this method is very efficient.
How to Preserve Flowers in Resin – Step by Step
Now that you have all of your materials ready, it’s time to start preserving flowers in resin. Learning how to preserve flowers in resin is actually really simple, and it can easily be done at home. This is a fun and rewarding hobby for all ages. Follow our step-by-step tutorial below to get started.
Preparing the Mold
First, make sure that your molds are prepared and all of your materials are laid out and ready. We recommend using silicone molds as they release the finished product easier. You will need to apply a layer of release agent over the entire inside of each mold before proceeding. This will help the cast resin item to pop out of the mold easily.
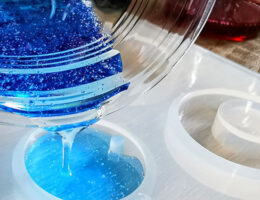
Mixing the Resin
Start by mixing together the resin to get it ready for pouring and curing. Casting resins come in two separate parts that need to be mixed together in order for the resin to become active. These components are the hardener and resin. Once they are combined, the curing process will slowly start to begin. It is important that you work fairly quickly after mixing the resin, as it has a limited pot-life before it begins to harden.
The resin needs to be mixed through very well at the correct ratio. This should be done in a plastic cup or jug that allows you to pour easily. Use wooden stirring sticks to mix the resin. At this stage, you could also choose to color the resin by adding mica powder, dyes or pigments. However, you will usually keep the resin clear for preserving flowers to allow you to see the flowers better once cured.
Pour the Base and Place the Flowers
Now the resin is mixed it is time to start the pouring process. First, pour a small amount of resin into each mold. This can be about halfway up the mold. Then place your dried flowers onto this resin. Using teazers is the easiest way to carefully do this. Make sure that the flower is positioned exactly how you want it to be set into the finished product.
Casting the Mold
IRAN ART EXHIBITION: The next step is to fill up the rest of the mold with resin. Slowly pour the resin over the flowers to fill up the mold. You may need to use a skewer stick or toothpick to hold the flower into place while you cover it with resin. At this stage, your mold should be filled with resin and the flower should be positioned inside the resin.
Removing Air Bubbles
At this stage, there may be some air bubbles that have formed. It is important to get rid of these before the resin cures, otherwise, the bubbles will stay in your finished product. There are a couple of different ways to remove air bubbles.
A simple method is to use a toothpick or skewer and simply poke the bubbles to pop them. This is useful for smaller molds without too many bubbles. If there are lots of bubbles, you could use a hairdryer or blowtorch. Turn the heat on, and gently wave it over the resin. Do not get too close to the resin, just apply a slow and gentle application of heat. The application of heat should get rid of the bubbles. Another method is to cure the resin in a pressure pot. While this is most effective for removing air bubbles, most home crafters will not have a pressure pot readily available.
Curing the Resin
The final step is to leave the resin harden and cure to become the finished product. We recommend covering the resin with something like a cardboard box in order to prevent any dust or insects from settling into the wet resin. Leave the molds alone until they are completely cured. The time will vary depending on the product, but it can take anywhere between 12 – 72 hours to achieve a fully cured casting. Generally, 24 hours is enough.
Remove the castings from the silicone molds and they should be ready. If you want, there is an optional final step for finishing the resin. This includes sanding and polishing the resin. We recommend wet sanding the resin with fine-grit sandpaper until you achieve a completely smooth and even finish. Wash this off, dry it, and polish it if you want. This will leave you with a shiny, clear cast resin object.

Tips and Tricks
Preserving flowers in resin is a pretty basic process that always follows the same general steps. However, there are a few other considerations to make when doing your castings.
Is it Better to Seal the Flowers Before Casting in Resin?
Yes, we would recommend you seal the flowers before adding them to the casting mold. Sealing the flowers will help to prevent air bubbles from forming, and it will allow the flower to better set in the right position in the mold. This is done by simply dipping the flowers in the resin first to form a very thin coating around them. When you add the flowers into the mold, they will already have a resin seal and will end up setting much better.
How to Preserve Fresh Flowers in Resin
Knowing how to cast fresh flowers in resin is useful for anyone wanting the fresh flower aesthetic. When learning how to preserve fresh flowers in resin, there are a couple of unique steps to take.
First of all, you can just set the fresh flower straight into the resin as we did in the tutorial above. This can work well, but there is also the risk of the flower turning brown over time. You could seal the fresh flower using clear glue before adding it to the resin. This helps to preserve certain flowers better. Another option is to spray the fresh flower with hairspray before you cast it in the resin. This will provide a protective barrier that helps to preserve the flower.
When learning how to cast fresh flowers in resin, it is important to realize that different flowers react differently to the resin. Therefore, you should first research whether the specific flower you are using is suitable for fresh casting, and what method would be best to preserve it.
Do You Have to Dry Flowers Before Putting Them in Resin?
One of the first things that people ask is always: “Do you have to dry flowers before putting them in resin?”. Ideally yes, it is highly recommended. Fresh flowers can be cast in resin, but there is a good chance that they might discolor or decompose. Preserving flowers in resin that have been dried is easier and less risky.
Roses in Clear Casting
IRAN ART EXHIBITION: Setting roses in clear casting molds is also a fairly unique process. Start by drying the roses completely. We recommend doing the hanging method or drying them in silica gel. This allows you to dry entire roses and not just their petals.
When dry, you will need to set the roses in clear castings. As roses are bigger, you will need a larger, deeper mold. The process is the same as other flowers. Seal the roses, place them in the mold, and cover them with casting resin. Be sure to pour the resin very slowly, and leave the mold for a long period before it is fully cured.
Frequently Asked Questions
How Long Will Flowers Preserved in Resin Last?
Resin is an incredibly durable substance. As long as the flower is dried and cast properly and the resin is kept safely, it can last for many years.
Do Flowers Decompose in Resin?
It is possible for fresh flowers to decompose in resin. For this reason., you should use flowers that have been fully dried.
Can Fresh Flowers Go in Resin?
If you don’t like dried flowers, you may ask “can fresh flowers go in resin?”. While it is possible to do this, learning how to preserve fresh flowers in resin is a little bit tricky, and the flowers can discolor quite easily. We recommend drying the flowers.
Will Flowers Float When They are in the Resin?
Flowers do naturally float in resin. The best way of stopping this is to pour the resin in layers. First, pour a small layer, set the flower in place, then pour a layer on top of it.
Preserving flowers in resin is one of the most rewarding projects to easily do at home. Resin flower casting can be used in all sorts of designs, and it is great fun to do. Follow our simple tutorial above and you should enjoy a successful flower casting project!