IRAN ART EXHIBITION: THE EASIEST WAY OF MAKING CLAY FLOWERS
How to Make Clay Flowers
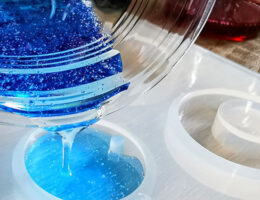
Ceramic flower making takes a bit of time and practice. Bone china is a very sticky clay so you use oil such as sunflower oil on your fingers to stop it sticking. It is very soft and can only be sculpted into tiny or palm of the hand size flowers. This is only great for small ceramic clay flowers.
You can make flowers out of any clay with a some of practice. The techniques will work with any clay so can be tried using the air drying clay or other clays you may wish to work with.
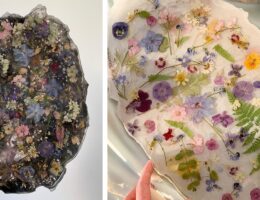
Clay flowers are a popular and fun craft for people of all ages. It’s easy to make jewelry, buttons, or accessories with your clay flowers. The easiest and most popular flowers to make with polymer clay are daisies and roses, but you can add your own style to any flower that you make. Don’t be afraid to get creative and make your own type of flower!
Making Basic Daisies
1
Hold and rub the clay in your hands to warm it up. Roll and knead the clay of your choice in your hands. You can use white clay for the entire flower or a different color for your petals and for the center of the flower.
When the clay is ready, it’ll be easy to squeeze and flatten it between your hands.
2
Roll 1 clay ball for each petal of the daisy. Decide how many petals you want to have around your daisy, and break off equal sized pieces of clay from the main ball of clay. Then, use your hands to make balls out of the pieces of clay.
Most daisies have anywhere from 5-20 petals. If you want a daisy with a lot of petals, make 16-20 balls. If you want a daisy with space in between the petals, make 5-7 balls.
You can roll the pieces between your hands or fingers to make the balls.
3
Pinch and roll the top of the clay ball to form a teardrop shape. Once you’ve made all of the balls, use your thumb and forefinger to elongate the top of each ball. Then, roll it into a cone shape to form a tear drop.
The pointed end will be behind the center of the daisy, and the thicker end will be the visible part of the petal.
4
Press down on the larger end of the tear drop to flatten it. Use your thumb or a tool to gently flatten the thicker end. Then, carefully smooth the sides and elongate the petal by pinching and pulling slightly on the flattened part. Once it’s long enough, flatten the pointed end of the petal until it’s the same thickness as the wider end.
IRAN ART EXHIBITION: Make sure all of your petals are roughly the same size and shape. If one of them looks a little too small or large, simply roll it back into a ball and try again.
5
Make another ball of clay for the center of the daisy. Pull off a piece from the main ball of clay, and roll it between your hands or fingers. Then, place the ball on a flat surface to build the flower around it.
The ball should be around the same size as the balls you made for the petals.
6
Arrange your petals on top of the ball, radiating outward in a circle. Place the petals upside-down on the ball, with the pointed end on top of the ball. Overlap them slightly if you have a lot of petals, or just barely let them touch if you only have a few.
Try to keep the arrangement even with the petals equally distributed around the center. If you have more petals on one side, the flower will look lopsided.
7
Turn the flower over and press down on the center to flatten it slightly. Carefully lift the flower up and place it with the petals on the back. If you’re going to bake the clay, place it on a tray or ceramic baking dish. Then, use your thumb to gently press on the center ball of the daisy to make sure it sticks to the petals.
Don’t press too hard on the center because this can cause an indentation. Make sure the circle is still slightly raised.
8
Bake the flower for 15 minutes at 265 °F (129 °C) to harden it. If you want your clay flower to last for a long time, you can bake it in the oven. Preheat the oven to the right temperature while you work on the flower, and put it in the oven when you’ve finished it.
IRAN ART EXHIBITION: Remember to check the packaging for the clay to make sure you can safely put it in the oven.
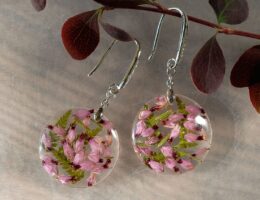
If you want to wear your flower, you can make it into a necklace or poke holes into a smaller daisy to make a button for a jacket.