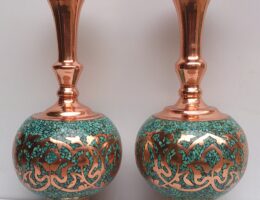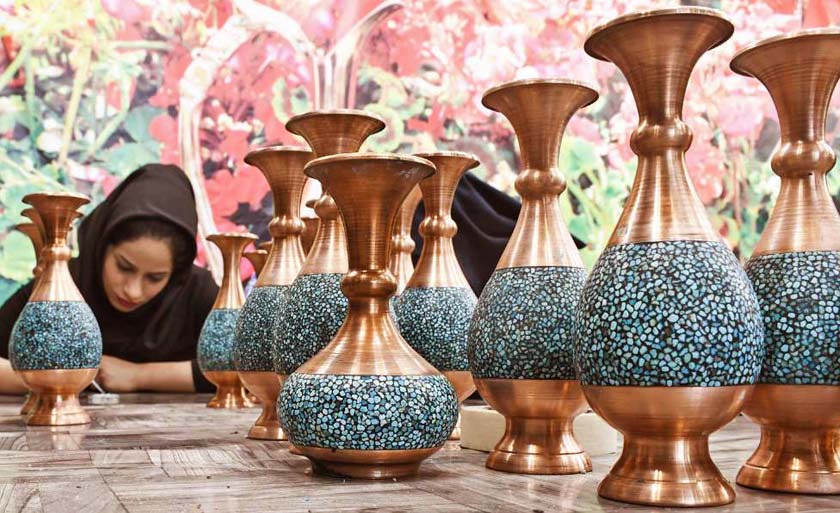
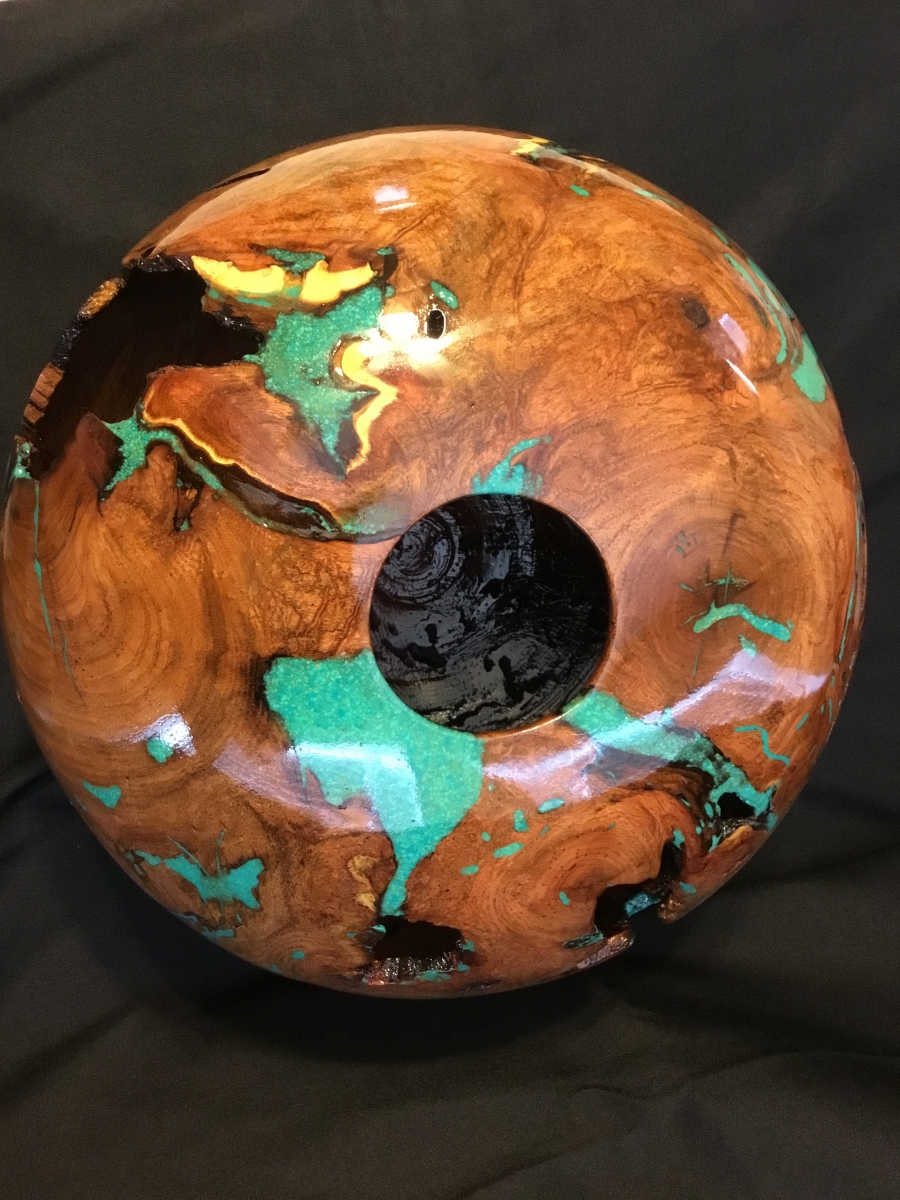
IRAN ART EXHIBITION: MAKING A TURQUOISE INLAY ON A WOOD BOWL
Applying a Turquoise Inlay is a great way to create a stunning visual accent or even save a cracked bowl.
How do you make a turquoise inlay on a wood bowl?
There are a couple of turquoise inlay techniques you can use. Here’s one way to create a turquoise inlay:
• Apply turquoise particles and dust into the wood crack
• Bond turquoise in place with thin CA cyanoacrylate.
• Finish turning and sand the surface smooth.
Another process of creating a turquoise inlay is:
• Make a slurry with turquoise dust and fast setting epoxy.
• Apply the epoxy slurry to the crack and let it cure.
• Sand or finish turn the surface until smooth.
In addition to these two techniques, I will share with you a third way to add turquoise to your wooden bowls.
The steps are simple, but there are many more essential details. This article will cover all the details for making perfect turquoise inlays every time.
COLOR OR GEM?
First off, you’ll need to decide if you want to use genuine turquoise or a turquoise colored substance.
Turquoise can be expensive and somewhat challenging to work with, but it also has a very unique appearance.
There are many turquoise-colored substitutes on the market that can fill a crack and leave beautiful results.
COLOR CONCEPT
Why are we so fascinated by turquoise?
Obviously, people love that light blue-green color, but why?
I have an idea of why we might be drawn to turquoise in general. It goes back to the simple yet powerful color wheel. Opposites attract and compliment.
Yes, we can pull out the good old color wheel and see that turquoise, or rather the area between blue and green is opposite red and orange.
In life, we have many sources of orange and red, most of which are diluted and toned down from their pure pigments. Natural landscapes, human flesh, and of course, wood all contain elements of orange and red.
Turquoise naturally complements and accentuates many natural elements around us. The wood of our bowls is filled with toned-down orange and red hues, so a turquoise inlay is an exciting visual treat to experience.
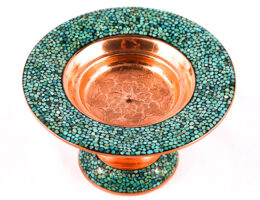
I love taking advantage of this color contrast fact by placing turquoise inlays on cherry wood bowls. The deep red hues of the cherry are perfectly complemented by the turquoise color.
TURQUOISE COLOR VALUE
Turquoise and turquoise alternatives can range dramatically in lightness and darkness value.
A lighter turquoise-colored inlay can be subtle and cause a second glance on a light-colored wood. Or that same light-colored inlay can cause a shock of surprise on dark-colored wood.
Similarly, a darker colored turquoise inlay on a dark wood can appear elegant and refined. On a lighter wood, a dark turquoise inlay will quickly draw and focus the viewer’s attention.
There is no wrong or right way when it comes to the lightness or darkness of turquoise to use. Just be aware of the effect the turquoise light and darkness value will have on the wood you are turning.
TURQUOISE HISTORY
Turquoise, the mineral, has a rich history and has been used decoratively for centuries. It is believed that turquoise was first found in mines in the Middle East near present-day Iran and has been used since 200 B.C.
TURQUOISE MINES
There are specific locations where turquoise is mined, and each site offers a slightly different final product. Arid desert locations associated with copper and aluminum deposits is where turquoise is mostly located.
Turquoise can vary in color from light robin egg bluish-green to dark deep greenish-blue and everything in between. Turquoise can vary in color and pattern depending on what other minerals are present in the mining location.
REAL VS. FAKE TURQUOISE ALTERNATIVE
Treated or stabilized turquoise is produced by using lower grades of turquoise or porous turquoise along with dust particles and bonding them together, usually with an adhesive agent.
Stabilized turquoise is easily discovered when broken down. Instead of that rich signature turquoise color, the dust from stabilized turquoise will appear faded or cloudy due to the added adhesive material.
Pure turquoise dust and particles should appear the same in color regardless of size. This is the tell-tale way to know if a piece of turquoise is genuine turquoise or a conglomerate.
IRAN ART EXHIBITION: Unfortunately, there is also fake turquoise on the market that is made of ceramic or plastics. Upon crushing, these fake turquoise substitutes will quickly be discovered because the dust will appear white and chalky.
TURQUOISE SOURCES
You can find turquoise in various locations, including mining it first-hand. While becoming a rock hound and mining turquoise yourself might not be what you had in mind, there are other ways to get your hands on turquoise.
Another source is old jewelry. You might want to ask before browsing through someone’s jewelry collection. It’s probably a better thing to look for turquoise at garage sales and thrift stores. Just beware of the fact that fake turquoise won’t amount to much for an inlay.
Another option is to purchase turquoise from rock and gem stores. These places will often have good alternative options for turquoise as well.
If you’re fortunate, you can find a jeweler that works in turquoise and will sell scraps and dust to you as needed.
TURQUOISE HARDNESS
An issue with real turquoise is its hardness. On the Moh’s Hardness Scale, turquoise is a 6. Like wood and the Janka Hardness Scale, stone has a hardness chart as well.
On the Moh’s Hardness Scale talc (chalk) is a 1 and diamond is a 10. With turquoise hitting the above center point with a 6, it can be a bit difficult to crush and sand pure turquoise.
TURQUOISE ALTERNATIVES
Turquoise is so unique that it defines and names a color all to itself. However, that turquoise color varies through a range of blue-green to green-blue hues.
If you’re looking for a beautiful blue or green stone to create an inlay, there are a couple of natural stone alternatives that are easier to work with than turquoise.
Azurite and malachite are two minerals with a hardness of 3-4 that are much easier to work with compared to turquoise.
In addition to natural stones, various additional alternative products can be used to fill cracks on a wood bowl.
CRUSHING TURQUOISE STONE
If you decide to use natural stone for your turquoise inlay, you may need to crush the mineral to size before making the inlay.
You can use a concrete chisel inside a metal coffee can control flying debris.
You don’t need a large stone to start with. Breaking even a small piece of stone can produce many fragments and much dust.
Another way to crush stone is to use two sheets of heavy metal to sandwich the stone and pound the top metal plate with a hammer.
Draping a plastic sheet under and over the metal plate sandwich will prevent pieces from escaping the sides.
NUGGETS OR DUST?
You will need to decide how much you want to crush the stone depending on what you want to achieve with your turquoise inlay.
If you simply what to make an even-colored turquoise inlay with a smooth appearance, crush the stone down to dust.
If on the other hand, you’d like to have a more diversely sized turquoise inlay, then crush the stone to small nuggets that are just small enough to fit in the cracks of the wood bowl.
BEST WOOD FOR TURQUOISE INLAY
All this talk about turquoise and stones makes me think we’ve forgotten about the wood bowl. That’s why we’re here in the first place.
Let’s talk about the bowl.
The wood species will play a factor if you decide to use real turquoise. As we mentioned earlier, turquoise is relatively hard and sanding that inlay will require more effort.
If a relative softwood is used to make the bowl that will have a turquoise inlay, the area around the inlay will most likely be altered during the inlay sanding process.
Alternative turquoise substitutes, which are not as hard, will not present the same challenge. This makes alternative materials just a bit more attractive.
Some examples of suitable wood species to use with a genuine turquoise inlay are hard maple, oak, beech, walnut, osage orange, rosewood, and cocobolo.
If you are using an alternatively softer material than turquoise, the wood species will not be as much of an issue, and you can use almost any type of wood to turn your inlayed bowl.
NATURAL WOOD CRACK
Natural occurring cracks in the wood bowl are an excellent opportunity to apply a turquoise inlay. But, cracks don’t have to be naturally occurring. You can make your own too.
If you’d like to make a crack to apply a turquoise inlay, there’s nothing wrong with that as well. Consider making the crack along the grain lines like a natural crack would appear.
Use a Dremel or small pick to clear out an area and create the ideal crack. Look at natural cracks as a reference and don’t overdo it. I little crack goes a long way.
Whether naturally occurring or created, cracks in a bowl will need some preparation before they can be filled with an inlay.
PREPPING TURQUOISE INLAY AREA
Cracks in a bowl blank can be evident from the start or appear during the turning of a wooden bowl. Or, in the example above, they can be created from scratch.
It is important not to start filling the cracks of the bowl too soon in the turning process. Turn the bowl down to its almost final cutting passes before adding the turquoise inlay.
Small thin cracks will be challenging to fill well and can leave underlying voids. Use small dental pick tools like these to dig out and open up small fine cracks.
Use the same tools to remove loose wood fibers from all cracks. The sidewalls of each crack need to be clean and free of debris.
FILLING WORM HOLES
If you are filling wormholes, especially get out all impacted debris before applying an inlay. Inlay applied to wormholes with lingering loose material will probably work free overtime and can dislodge from the bowl.
IRAN ART EXHIBITION: Use an air compressor and blow out all the cavities to make sure they are clear. I can’t tell you how many times I’ve thought I cleared a worm tunnel only to discover a much deeper, more elaborate hole than I initially saw.
ANGLE OF THE CRACK
The sidewalls of wood bowl crack can be angled in countless ways. You will want to refine some of these walls to make them hold the inlay better.
An outside angled crack opening can be the worst for holding the inlay filling. Because the surface gradually tapers to meet the main wall, a fragile layer of inlay is created. This thin layer can easily chip off.
Instead of leaving a shallow angled crack wall, use a file or Dremel-like tool to reshape the sidewall and make it closer to 90 degrees to the bowl wall surface.
The best possible situation is to make the center of the walls of the bowl slightly concave inward. This concave shape will lock the turquoise filling in place, making it difficult to come loose over time.
CONTROLLING FLOW
If the crack to be filled goes all the way through the bowl wall, you will need to control the flow to contain the turquoise and filling adhesive.
Use wide masking tape to create a barrier on the backside of the wood where the crack will be filled. Carefully check for any gaps or open spots and cover them securely with tape.
TURQUOISE INLAY PROCESSES
SMALL QUICK TURQUOISE TOUCH (PROCESS 1)
If your bowl only has a couple of small surface cracks that you’d like to fill with a turquoise color inlay, try this approach. This technique works best with small cracks that don’t go all the way through the wood surface.
Spray a thin coat of canned lacquer around the crack area and let the lacquer dry. This thin lacquer coat will act as a mask to protect the wood surface from CA staining.
Use fine turquoise dust or an alternative filler product like one of these mica powder pigments to pack the crack before using any adhesive.
Use a toothpick or similar tool to pack the powder into the entire crack.
Once the crack is filled with colored powder carefully drizzle super thin CA over the colored material until it is completely saturated. Try not to get excess CA on the wood surface.
EASY TURQUOISE INLAY (PROCESS TWO)
An easy turquoise inlay technique is to use a fine powder of turquoise or other mineral or substance and mix it with fast setting epoxy to make a colorful crack filling slurry.
IRAN ART EXHIBITION: This technique works well with larger cracks and can be used to quickly seal and patch large areas of a wooden bowl.
I like to use a five-minute epoxy which has a two-part mixing process.
MIX IT UP
Place a couple of strips of wide masking tape to form a temporary mixing surface and mix the epoxy according to the product instructions.
the fast setting epoxy mixing process is usually equal parts of each A and B products but read the instructions carefully before you begin.
Once the epoxy is thoroughly mixed, take a toothpick and scoop up a minimal amount of the turquoise or other colored material and sprinkle it onto the mixed epoxy. Continue mixing until the epoxy is evenly colored.
It’s important to note, a small amount of turquoise or other colored product mixes well and goes a long way.
Work quickly, pack the colored slurry into the crack until it is flush with the wood surface.
Watch for any leaks, overflows, or areas that did not get filled all the way. Allow the epoxy to dry and harden.
DESIGNED INLAY CHANNEL (PROCESS THREE)
The third technique for making a turquoise inlay is a very deliberate and controlled process of showcasing beautiful natural turquoise.
Turn your bowl to the final shape and decide where you would like to place the inlay channel. Usually, a location on the topmost visible surface of the bowl works well.
Using the tool of your choice, make a small shallow groove or channel that will be used to show off the turquoise.
Bonus Tip – use the angled tip of a skew chisel to make the side walls of this channel slightly dovetailed inward. By doing this, you are ensuring that the turquoise inlay will be very securely locked into the bowl structure.
SIZING TURQUOISE NUGGETS (PROCESS THREE)
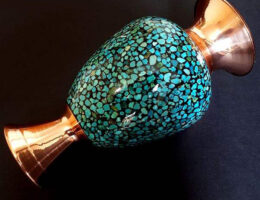
The previous two processes create an even fine turquoise texture with little size variation. The technique we’re going to do next will display a variety of different sized turquoise.
Take some time and sort out your turquoise nuggets. The largest chunks should just barely fit in the channel you created. If they are too big, go back and do some more crushing. See above for the best way to crush turquoise.
Make three different piles of turquoise nuggets. One collection of nuggets should be the size that just barely fits the channel and maybe stick out just a small amount.
The second pile of turquoise nuggets should be about half the size as the first nuggets.
Finally, make a third pile of very small nuggets and the remaining dust that was created from the crushing process.
MAKING TURQUOISE LAYERS (PROCESS THREE)
Place just the larger nuggets around in the channel and position them where you like. Use a medium CA glue, which is more like a gel compared to the super-thin CA, and glue the large nuggets in place.
Take your time and work around the sides of all the nuggets until they are all secured to the wood channel.
Do not use the CA to try to fill the whole channel yet, just add enough medium CA to hold the bottom of the large nuggets to the wood channel.
This technique can also be used to fill large cracks that go all the way through the bowl sidewall. Again be sure to thoroughly dam the crack area first.
Once the large nuggets are secured, and the CA is dry, arrange medium-sized turquoise pieces around the larger one and again glue these in place with the medium CA.
With the majority of the channel filled with large and medium-sized turquoise nuggets, fill the remains cavities with fine turquoise pieces and dust.
IRAN ART EXHIBITION: Another option for this final layer is to create the colored slurry (as described in the second technique above) with a fast setting epoxy and spread that mixture over all the recessed areas of the channel.
Because the clear surrounding area can be more visible with this layered process, another option is to use resin, instead of CA or epoxy. I would still use the medium CA to adhere the first large nuggets in place.
LEVELING AND REVEALING
Once the CA and/or epoxy has had enough time to thoroughly dry, you can begin sanding the surface of the turquoise channel to make it flash and even with the surrounding wood.
The first two processes will sand very quickly and with little extra effort.
If you have used real turquoise, you will need to be patient and do a lot of sanding initially with more coarse grit sandpapers. Natural turquoise is relatively hard and will sand slowly at first.
With the third process, layered turquoise technique, as you sand and level the turquoise channel, the various different sized nuggets will become more apparent.
If you come across small voids or areas that chip out, just mix a slurry of fine turquoise and epoxy or CA and fill that area before continuing.
TURQUOISE INLAY CONCLUSION
Applying a bright pop to your wood bowls is a fun and exciting process.
There are numerous ways to go about adding turquoise inlays. I hope this article has inspired you to try out at least one of these fun techniques.
Let me know how your piece turns out and if you have additional questions or tips based on your experience with wood bowl inlays, leave a comment below. We’d all love to hear your story.