IRAN ART EXHIBITION: TINY WORLD OF MACRO PHOTOGRAPHY
Macro photography began as a scientific pursuit: scientists attached to microscopes to cameras in order to photograph microscopic subjects. Today, macro photography is a fun way to capture extremely small scenes in vivid detail.
What Is Macro Photography?
Macro photography is a form of close-up photography, originally developed for scientific research. The strictest definition of macro photography is that the subject is photographed at 1:1 magnification—in other words, the subject is life-sized in the photo.
However, most people use the term “macro photography” to refer to any photograph that depicts a close-up and extremely detailed image of a small subject.
What Are the Origins of Macro Photography?
Macro photography as we know it began in the early 1900s, when F. Percy Smith began photographing insects using much of the same equipment we use today: bellows and extension tubes. These devices placed the lens further away from the film negative, creating a closer focal point and allowing for more close-up images.
In the 1950s, the invention of the SLR (Single Lens Reflex) film camera, which allows the photographer to see through the actual camera lens using the viewfinder, made macro photography more widely available and easier for the amateur photographer to pick up. SLR cameras led to a boom in macro photography, which in turn led to the invention of the first dedicated macro lens.
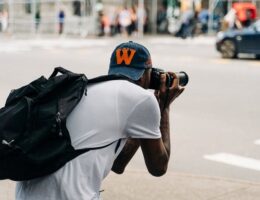
Today, there are a wide variety of digital cameras, lenses, and other tools to aid in the production of macro photography. The most important piece of equipment you’ll need is a good macro lens.
3 Types of Macro Lenses
A macro lens is a type of camera lens that is specifically designed to focus close up to the subject with a 1:1 (life size) reproduction. Macro lenses come in many different focal lengths, from 35mm all the way up to 200mm.
1. Short macro lenses (35mm-60mm): These macro lenses are light and inexpensive, but they also require you to stay very close to your subject, which can cast shadows and (worse) scare your subject away.
2. Intermediate macro lenses (90mm-105mm): These mid-range macro lenses have a longer working distance, but are still light enough to use without resorting to a tripod.
3. Long macro lenses (150mm-200mm): Macro lenses with a longer focal length produce the highest quality photos at the longest distance, making them ideal for shy macro subjects like insects. However, they’re also the heaviest and most expensive macro lenses.
IRAN ART EXHIBITION: For beginners or amateur photographers, most experts recommend a macro lens with a focal length between 100mm 150mm. Popular macro lenses to consider include:
• Sony: Sony FE 90mm f/2.8 Macro G OSS or Sony E 30mm f/3.5 Macro
• Canon: Canon EF 100mm f/2.8L Macro or Canon MP-E 65mm f/2.8 1-5x Macro
• Nikon: Nikon AF-S VR Micro Nikkor 105mm f/2.8G or Nikon AF-S DX Micro Nikkor 40mm f/2.8G
• Tamron: Tamron SP 90mm f/2.8 Di Macro 1:1 VC USD
• Sigma: Sigma APO Macro 180mm f/2.8 EX DG OS HSM Lens

What Is the Best Camera for Macro Photography?
While a macro lens is the most important piece of macro photography equipment, it’s crucial to start with a high quality (and lens-compatible) camera. While both standard DSLR cameras and mirrorless cameras are good options for macro photography, mirrorless cameras have the advantage of displaying the final photograph for review through the viewfinder. This means you can set up your shot and make adjustments without moving the camera. If you opt for a mirrorless camera, be sure that it has an electronic viewfinder for close-ups, since focusing a macro shot from an LCD screen is very difficult.
IRAN ART EXHIBITION: Here are some examples of camera brands and models to consider for macro photography:
• Canon. Canon cameras tell you the actual aperture rather than the “functionally correct” aperture. The Canon EF series is a good option for macro photography.
• Nikon. Nikon cameras boast the highest resolution, with 36 megapixels. The Nikon AF series is a good option for macro photography.
• Sony. Sony has been specializing in mirrorless cameras for longer than Canon and Nikon, and the A-series full frame is a top mirrorless option.
• Other brands. Micro four thirds cameras, such as the Olympus M macro shooting line, are a good starting point for macro photography. Other brands to consider are Pentax
What Are Extension Tubes and How Are They Useful in Macro Photography?
If you can’t afford a macro lens, extension tubes can help you take close-up photos without one.
• Extension tubes are essentially hollow tubes that you attach to your existing lens in order to extend its focal length.
• Extension tubes are typically sold in sets, which can be mixed and matched depending on the situation.
• A starter set of extension tubes generally costs about $150–$200.
• When selecting extension tubes, spend a bit more money and purchase an extension tube that offers electrical connections between your lens and the camera, allowing greater control with settings like aperture and focus.
IRAN ART EXHIBITION: Extension tubes are not without drawbacks. For instance, because they place more distance between the lens and camera sensor, extension tubes reduce the amount of light that hits the sensor. Consequently, you’ll have to adjust camera settings like aperture and shutter speed to compensate. Keep in mind, too, that extension tubes are only as good as the lens they are attached to. Invest in a good lens from the start, and your photos will turn out better.
What Are Macro Filters?
Another option for achieving macro effects with your existing lens, close-up filters mimic macro photography by enabling close focusing distances. A close-up filter screws onto the front of your lens and essentially acts as a magnifying glass.
Close up filters are the most inexpensive way to take macro pictures, and they’re very easy to carry. However, they’re often manufactured with lower-grade glass, and can significantly reduce image quality.
How Aperture and Depth of Field Work in Macro Photography
Macro lenses offer a very shallow depth of field, particularly at the closest focusing distances. This can make it very difficult to get all of your macro photography subject in sharp focus. Lowering your aperture settings to f/16 increases the available depth of field, making focusing easier.
IRAN ART EXHIBITION: It’s also worth noting that the magnification effects of macro lenses, combined with exposure and depth of field, can change the effective aperture of your camera. For instance, while you may be technically shooting macro at an f-stop of f/11, the above factors mean that your camera’s “functional aperture” is closer to f/22. (Some camera brands, like Sony or Nikon, compensate to display this working aperture, while others, like Canon, do not.)
5 Macro Photography Techniques
Finding the proper camera settings for macro photography is much more a process of experimentation or trial and error than it is a hard science, but there are some baseline things to keep in mind.
1. Use flash. While decreasing your aperture will give you the depth of field you need to get your subject in focus, it will also allow less light into your camera. If your setting doesn’t offer enough natural light, using your camera’s flash or a macro ring light can help counteract this problem. A flash may startle the subject, however, so a flash diffuser might come in handy to soften the light and leave your subject undisturbed.
2. Use manual focus. At high levels of magnification, the autofocus feature on most cameras ceases to work because it cannot automatically find a focal point. IRAN ART EXHIBITION: Instead of using autofocus, get as close as possible to your subject and use the manual focus on your camera. Once you’ve found the optimal setting, rock your body back and forth to bring different parts of the image in focus. Snap a picture every time the subject is in focus. If you can’t get the whole subject in focus, try taking multiple shots with different parts of the subject focused.
3. Use a tripod. Between shallow depth of field, using manual focus, and delicate camera positioning, it’s extremely difficult to achieve optimal results in macro photography without using a tripod to stabilize your camera. A tripod setup is ideal for macro photos of stationary objects, but can also be used to get better results for live subjects like insects. Using a tripod can also help you take a series of nearly identical photos, which is crucial for the focus stacking technique outlined below.
4. Take plenty of shots. As with any photography method, the more photos you take, the more room you’ll have to experiment, and the more opportunities you’ll have to get the perfect shot. This is especially true of macro photography, where you may not get another chance to be so up close and personal with your subject.
5. Stack photos in post-processing. Aside from changing your aperture, another method for obtaining a greater depth of field for macro photography is to “stack” a series of photos using a post-processing software like Adobe Photoshop. This involves taking multiple photos of the same subject at different focal lengths, then layering them using software.

4 Subjects for Macro Photography
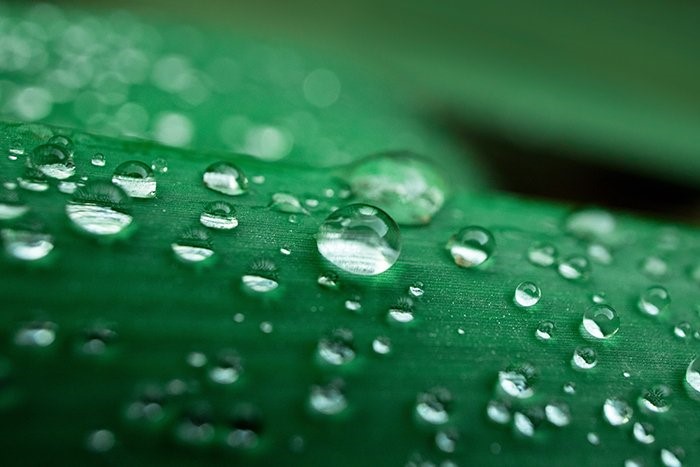
IRAN ART EXHIBITION: Macro photography was invented to capture insects and plants that the naked eye could not see in detail. To this day, macro photography is a great way to get close-up shots of flies, bees, dragonflies, butterflies, worms, flowers, leaves, grasses, and more.
1. Nature. Macro photography is a great way to discover the “secret lives” of these creatures and flora and fauna. You can go to your local park, or even your backyard, to find subjects to photograph. If you are not sure where to go, try a place with water—many plants grow near water and bugs like to be near water. As with any nature photography, be sure to cover yourself thoroughly to protect yourself from bug bites, wearing long pants, long sleeves, a neck covering, and, if needed, gloves.
2. Portraits. There are many other subjects to photograph on a macro scale outside of bugs and plants. Macro photography is a great way to create a unique portrait of a person. You can photograph their eyes, ears, or nose at close range to pick up human details that other photography methods would miss. Just make sure your subject is comfortable having this part of their body under the microscope of your lens.
3. Food. From fast food chains to fine dining restaurants, food photographers make extensive use of macro photography to accentuate the colors, textures, and craftsmanship of foods and beverages.
4. Products. Photographers use macro photography in to create detailed shots of different products, including consumer electronics, jewelry, and other luxury goods. If you want to use macro photography to aid your photography business, practice capturing the details of different products around your house—a mascara brush or a set of pencils, for example.