IRAN ART EXHIBITION: TAKE MY ADVICES FOR BEGINNING YOUR ASTROPHOTOGRAPHY JOURNEY
If you’re interested in capturing photos of the night sky, these beginner astrophotography tips will guide you on your way. I’ll explain how to take your very first photo of the stars, the Milky Way, and even deep-sky galaxies, nebulae, and star clusters.
There are many different types of astrophotography, from wide-angle Milky Way photography to deep-sky photography through an astronomical telescope. The basic elements of this hobby include the understanding of long exposure images, focus, and image processing.
The following basic astrophotography tips and camera settings can put into action the next time you find yourself under a clear night sky with your camera. I’ll also show you a beginner astrophotography setup for capturing deep-sky images using a camera and telescope. If I can do it, you can do it too.
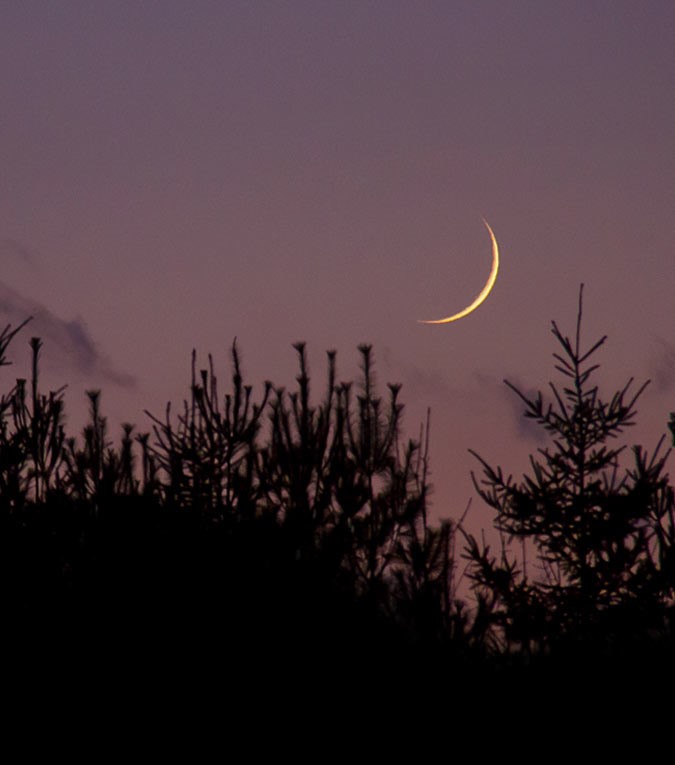
Perhaps the intense colors of the Orion Nebula or the glimmering Pleiades star cluster have sparked your interest in astrophotography. Or maybe a haunting landscape photograph dominated by a full moon is more your style. However you got here, I understand your passion.
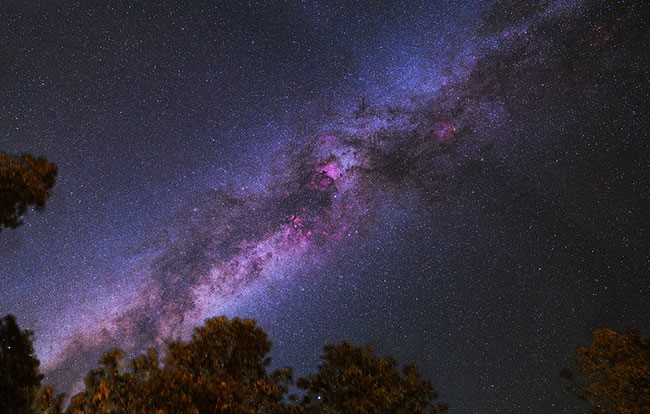
Night sky photography requires a basic understanding of your camera’s ISO setting and the process of taking long-exposure images. If you are a beginner, I’ve got good news. With an entry-level DSLR camera and a tripod, starry landscapes like the one below are within your reach.
The photo above did not use a telescope to capture the scene. Instead, a wide-angle camera lens was used to properly expose the picture and showcase the colorful stars in the night sky. If you’re interested in capturing “starscape” style images like this, have a look at my top 7 astrophotography tips for beginners.
Astrophotography can come in many different forms. It is wise to choose your subject matter based on the camera equipment you currently own. Setting your expectations to what’s possible with your personal gear will help you stay motivated and learn what’s needed to take the next step.
My astrophotography equipment has evolved and expanded over the past 8 years, and the learning process never ends. The small milestones and gradual progress along the way are what motivates me to continue pushing forward.
There are simple ways to get started in astrophotography that don’t require a large investment of time or money.
For instance, with a basic DSLR camera and a tripod, landscape images of the Milky Way and the Planets are well within your reach. Whether you’re shooting a lunar eclipse, meteor shower, or a familiar constellation of stars, the sensitivity, and control of modern camera sensors are well suited for astronomical imaging.
IRAN ART EXHIBITION: When you are ready to take your passion further, I’ll explain how to use a camera and telescope to take deep-sky images of galaxies and nebulae. This includes sharing my knowledge on camera control software, autoguiding, image processing, and much more.
The backyard setup shown below may seem a little complex at first, but it did not happen overnight. If you are passionate about astronomy and photographing objects in space, your progression and enjoyment in the hobby of astrophotography will last a lifetime.
Beginner Astrophotography Tips
We all have to start somewhere. If your passion is strong enough, it will carry you through the steep learning curve involved in astrophotography. Early on, I did not have a lot of money to invest in this hobby, and my basic equipment reflected that.
One look at a typical deep-sky imaging setup may have you scratching your head. The good news is that you can slowly build your astrophotography kit to accomplish your goals over time.
Choosing a camera, telescope, and an equatorial mount will deliver the results you’re looking for takes time. Avoid the temptation of purchasing the best equipment money can buy from the start. First, you need to first learn the night sky – and the basic principles of night sky photography.
A beginner telescope
I started with little more than a digital camera and a small (non-tracking) beginner telescope. A Dobsonian reflector is a fantastic way to learn the night sky from your location, and begin to appreciate the scale and vastness of space. It requires that you manually move the telescope by hand, and observe the deep-sky objects you find in the eyepiece.
Over time, my equipment evolved into a deep-sky astrophotography kit that allows me to photograph galaxies, nebulae are star clusters. A tracking telescope mount and astrophotography telescope are required, but I advise that you take small steps towards your goal of deep-sky imaging.
A visual astronomy telescope is what sparked my passion to photograph deep-sky objects, and helped me to better understand what it’s like to spend a lot of time under the night sky. I highly suggest taking this route before jumping into astrophotography too fast.
The last thing you want to do is rush into making a purchase that you regret. Below, I will describe the gear that has provided me with actual results for a reasonable price.
Choose an Area of Interest
Some people prefer different areas of astronomy including Solar imaging or Milky Way landscapes. It’s no secret, deep-sky astrophotography is the realm of this hobby where I spend most of my time. There is just something incredible about the thought of photographing another galaxy, filled with its own solar systems and planets.
What type of astrophotography are you most interested in?
If you’re like me, you love all types of images that involve the night sky. However, a quest for a particular type of image may lead you down a new path that involves a new set of equipment and techniques. For instance, the photography equipment required to capture a photo of a lunar eclipse is very different than what’s needed for a long exposure image of an emission nebula.
The three keys to a successful deep-sky imaging run is accurate polar alignment, tracking accuracy, and balance.
The following is a list of the different categories you can dive into:
Types of Astrophotography
Let’s cover the different types of astrophotography that await you. The night sky is diverse, it’s full of billions of stars and some incredible treasures in between. The type of astronomy subject you are interested in will eventually decide which equipment you purchase, and the camera settings you will use.
IRAN ART EXHIBITION: Types of astrophotography include landscape, planetary, and deep-sky.
Some methods have a lower cost of entry and can be done with little more than a beginner DSLR camera on a tripod, while others will require some additional hardware to achieve results.
DSLR Camera and lens on Stationary Tripod:
Nighttime landscape photography is incredibly popular these days. Most images tagged #astrophotography on Instagram are exactly this. Whether it’s a shot of the Milky Way rising over a desert landscape, or simply a portrait of the Winter constellations, few images capture the mood that a night landscape can.
• Night Sky Time Lapse
• Meteor Shower Composite
• Milky Way Photography
• Constellation Composite
• Moon Phase Landscape
DSLR Camera and Lens on Tracking Mount:
This is landscape astrophotography on another level. A wide-angle lens such as the Rokinon 14mm F/2.8 can collect light over an ultra-wide area of the night sky. With a tracking mount, exposures of 1 minute or more are possible, which means collecting a much deeper view of the sky.
• Deep Milky Way Photo
• Wide Field Deep-Sky Image
• Solar Transit (Solar Filter)
• Solar Eclipse (Solar Filter)
• Total Lunar Eclipse
Beginners often start with a small star tracker for wide-angle astrophotography images. Entry-level camera mounts such as the iOptron SkyTracker Pro, or Sky-Watcher Star Adventurer are a great place to start. This opens the doors to long exposure photos that include deep-sky objects such as galaxies and nebulae.
A portable camera tracker is quick to set up, and easy to polar align and balance. The setup below features a Sky-Watcher Star Adventurer Pro mount, with a small telescope attached. This is a very capable little rig that can produce stunning astrophotos using a DSLR camera and lens.
A mid-range telephoto lens like the Rokinon 135mm F/2 is an excellent choice for a setup like this. In the photo above, you can see this lens mounted to a Star Adventurer Pro using the ball head adapter. This way, you can point the camera in whichever direction you want for long exposure imaging.
Point and Shoot Camera through Telescope Eyepiece:
IRAN ART EXHIBITION: Eyepiece projection astrophotography involves aligning the camera lens with a telescope eyepiece, to utilize the magnification of the eyepiece and or/Barlow lens. This method is useful for planetary astrophotography, but not deep-sky imaging.
• Solar Transit (Solar Filter)
• Planetary Imaging
• Solar Imaging (Solar Filter)
• Moon Surface Imaging

DSLR Camera attached to Telescope on Tracking Mount:
This is known as prime-focus astrophotography. The camera is attached directly to the telescope focus draw-tube. The focal length is determined by the type and size of the telescope optical design.
• Deep Sky Imaging (Galaxies, Nebulae, Star Clusters)
• Planetary Imaging
• Solar Imaging
• Detailed Moon Surface Imaging
Astrophotography covers a wide variety of styles and photography subjects. The type of image you’re after is up to you. We all have our own goals and unique taste. Personally, deep-sky astrophotography through a telescope is my biggest passion.
As time passes, I find myself becoming more and more interested in other types of astrophotography as well. For example, starry sky landscape images (nightscape photography) are becoming increasingly popular on social media, and I love the idea of traveling to dark skies for an unforgettable night sky photo.
Early Results using a DSLR
My first few shots of the night sky were out-of-focus landscape shots of the summer constellations in my parent’s backyard. I didn’t own a tripod, so I would use a towel angle the camera just right for a lousy shot of the stars above.
IRAN ART EXHIBITION: I used the only lens in my bag, an 18-55mm Canon Kit Lens. I figured that 18mm was as wide a shot you could take with a camera, so I thought that was a good start.
As amateur as those first few shots were, I could already see how the camera could capture more stars in the image than I could see with the naked eye. I think beginners are often shocked the first time they see the amount of stars in the sky captured through astrophotography.
Taking your first shot
If you’ve purchased a DSLR camera and a tripod, you’re are ready to get started. To start, have a look at the weather forecast for this week.
If the weather is clear, or mostly clear, you’re in luck.
Next, have a look at the current moon phase using moongiant.com. Nights surrounding the New Moon phase are best, where the effects of the bright moonlight are minimal. The moon washes out the fainter stars and deep-sky objects in the night sky.
For many types of astrophotography, the night of the full moon is the worst night to shoot on.
Whether you choose to travel to an interesting location or shoot from your backyard is up to you. It might be best to practice these techniques at home before venturing out to a new location in the dark.
Making sure your tripod is locked securely, aim your camera towards the brightest star in the night sky. The stars you see will, of course, depend on the time of year you are shooting. If you do not see any bright stars, angle the camera towards a distant streetlight or another distinguishable light source.
You will use a bright star to focus the camera lens.
Make sure your camera is set to Manual mode, and that your lens to manual focus. This will give you full control of the light you let into the camera.
Turn on the live-view function of your DSLR, and have a look at the screen. Depending on your current settings and brightness of your location, you may see several stars and your surroundings, or nothing at all. There are a few things you can do to see more light on the screen, including lowering the F-stop (Aperture) or bumping up the ISO (sensitivity to light).
These general settings work well at night:
Astrophotography Camera Settings
Focal Length: 18mm
Focus: Manual
White Balance: Auto
Aperture: f/4
ISO: 1600
Exposure Length: 25 Seconds
You can adjust these settings according to the DSLR camera and lens you are using. For instance, some lenses can let light in much faster with a wider aperture of F/2.8 or below. The Sigma 24mm F/1.4 is one example, and I have taken some incredible nightscape photos with it.
Focusing on a star
With the bright star(s) in view, magnify the image by 5X, and then 10X. Adjust the focus ring on your camera lens in and out until the star is as small as possible. This will ensure your focus is is very close to where it needs to be for an astro image. Making some small focus adjustments and taking test shots will get you even sharper.
Compose your shot
IRAN ART EXHIBITION: Use the stars in your field of view to compose the shot you want. For example, if your goal is to capture the Milky Way stretching across the sky, make sure that the core of our galaxy is well placed within the scene.
Add some foreground interest to the scene by including the environment around you. For example, natural landscapes that include mountains, rivers, and tall trees can make your photo of the night sky very dramatic and add context to the location.
Choosing the right exposure
When shooting on a stationary tripod, images of the night sky will show star trailing after about 15-20 seconds. Knowing this, you’ll want to shoot exposures as long as possible before the stars begin to trail.
Some people find it useful to use the 500 Rule as a point of reference. You simply divide the focal length of the camera lens (X the crop-factor of your camera) by 500.
Even if the exposure looks bright on the screen, you’ll be able to bring it back to a natural level in post-processing. In general, it’s best to shoot the longest possible exposure you can before star trailing occurs. If you are using a small camera tracker, you can compensate for the rotation of the Earth and capture sharp stars in exposures that are 2-minutes or longer.
ISO settings
A setting of about ISO 800 – 1600 should work well. Any higher than this will make the image brighter but come at a cost (more noise). Modern DSLR’s are much better at handling noise than they used to be but expect to see lots of grain shooting at ISO 3200 or above.
Noise can be reduced by capturing dark frames, and stacking the images together using software..
Images captured at night
Just like in regular daytime photography, the image histogram tells a story about the data captured in the image. Amateur astrophotographers tend to expose to the right, maximizing the light photons collected without clipping the data by overexposing.
Perhaps the strangest and most understood part of the deep-sky astrophotography process is the stretching of the data. A typical unfiltered “light frame” from my light-polluted backyard (Bortle Class 8) shows little more than a washed-out, pink screen with perhaps a small smudge and the brightest stars.
IRAN ART EXHIBITION: From a dark sky location such as Cherry Springs State Park in Pennsylvania – the sky will appear dark blue, but the galaxy or nebula in the frame will be extremely faint. Depending on the surface brightness of the image, little color or fine details will be distinguishable.
A large part of the image processing workflow involves pulling the data from the deep-sky object forward while leaving the background of space behind it alone. This increases contrast and can show the outer and faintest regions of the nebula or galaxy.
Globular and open star clusters do not need nearly as much of a stretch. Enhancing the saturation and color of the varying stars is more important here.
Entering Deep-Sky Astrophotography
This type of photography is known as prime focus astrophotography, and it’s how astrophotographers capture incredibly detailed portraits of deep-sky objects such as a nebula.

The type of camera used for deep-sky imaging is usually a DSLR, a dedicated CMOS sensor astronomy camera or CCD (Charged coupled device). DSLR cameras are one of the best ways to get started in deep-sky astrophotography, as they are affordable and user-friendly.
A dedicated astronomy camera such as the ZWO ASI294MC Pro has features that can help you produce incredible long exposure images. These cameras have TEC (thermoelectric cooling) to virtually eliminate noise from the equation.
A mono camera such as the ASI 1600MM-Cool has an incredibly sensitive CMOS sensor that can produce even better images than an OSC (one-shot-color) camera can.
IRAN ART EXHIBITION: Filters are used in a sequence of LRGB (Luminance, Red, Green, Blue) to create a color composite image of the subject. Narrowband filters that capture specific wavelengths of light can also be incorporated for an unforgettable deep-sky portrait.
Dedicated astronomy cameras, whether they are CCD or CMOS, are often much more expensive than a DSLR. They require specialized software to run them, as opposed to operating the camera on the body like you can with a DSLR.
Using a DSLR Camera
DSLR cameras record starlight onto the sensor just as the light from a regular daytime photo would. The difference is, much longer exposures are shot and combined to improve the signal-to-noise ratio.
A higher ISO sensitivity is used to maximize the light collected by the DSLR camera. ISO 800 – ISO 1600 are typical camera settings for a DSLR astrophotography image.
The images are combined by “stacking” the exposures together. This reduces the amount of noise in the image and can reveal much more of the color and detail in the deep-sky subject.
Calibration Frames
Along with the individual photos you capture (light frames), you can benefit from taking calibration files such as flat frames. Calibration frames such as dark, bias, and flat frames help correct the issues that come with long exposure photography using a DSLR camera.
Professional deep-sky imagers tend to use sensitive CCD cameras with a set of narrowband filters, but a regular DSLR camera is the perfect entry point into the hobby. There is some incredible work being done with DSLR cameras that rival much more expensive dedicated astronomy cameras.
Attaching a DSLR to a Telescope
To capture these deep-sky objects we need to use a telescope to bring these objects in for a closer view. The telescope acts as a super-telephoto lens, with typical focal lengths ranging from 400mm to well over 2000mm. The term “Deep-Sky” means distant objects in space, often millions of light-years away from Earth. This includes:
• Galaxies
• Nebulae
• Globular Star Clusters
• Open Star Clusters
IRAN ART EXHIBITION: These photos also capture a lot of interstellar dust, reflected by the stars around it.
The focal length you are using will depend on the size and design of the telescope. I use a small refractor telescope with a focal length of about 700mm. Multiplying this with the crop factor in DLSR camera I use, this brings my focal length to about the 1000mm range.
Choosing a Telescope
An 80-100mm refractor telescope is considered a wide-field instrument in terms of deep-sky astrophotography. Using a compact apochromatic refractor telescope, I can capture most of the largest deep-sky objects within a single frame. Certain nebulae, such as the North America Nebula are massive in apparent size, and take up the entire frame (and more).
The Explore Scientific ED80 is an excellent choice for beginners.
A wide-field telescope has many advantages, and it’s what I recommend for beginners. A wide-field telescope with a modest focal length is much more forgiving when it comes to star tracking. This is especially important during beginner astrophotography outings, as the satisfying results are more likely to inspire you to push forward.
Wide Field Views
The downside of a wide-field telescope is that small objects such as most galaxies will appear quite small within the image frame. For example, The Whirlpool Galaxy is a gorgeous face-on spiral galaxy, but it appears quite small in a compact refractor telescope.
If small galaxies and/or high magnification views of deep-sky objects and planets are your primary interest, it will require a different equipment setup.
I don’t advise beginners to attempt this type of imaging from the start. As the focal length of the optical instrument increases, so do the demand of the tracking platform and additional measures such as autoguiding.
A huge benefit of a wide field-instrument is that the largest galaxies such as the Andromeda Galaxy and the Triangulum galaxy will fill the frame nicely.
Tracking stars
In general, when it comes to deep-sky, it’s better to shoot wide and short in the beginning. Meaning shorter exposures through a small refractor telescope. This will increase your chances of success, and hopefully, inspire you to keep moving forward.
IRAN ART EXHIBITION: The longer your exposure is, the higher the chance that you will see an inconsistency in your telescope tracking. Your telescope mount may be capable of reliable 3-minute subs, but capturing an image for longer than may expose the limits of your mount.
The same goes for the focal length of your telescope. In a wide-field refractor, stars may appear small and round in a 3-minute exposure using your current setup. An image of the same length may show elongated stars through a high magnification SCT telescope.
To improve tracking, there are a number of things you can try:
• Balance your telescope and astrophotography accessories
• Ensure that no cables are being pulled or snagging
• Improve the accuracy of your polar alignment
• Use autoguiding to makes tiny adjustments to your mounts tracking pattern
A telescope with a long focal length will magnify any issues in tracking accuracy.
For this reason, I think that the best beginner astrophotography telescope is a wide-field refractor such as the Sky-Watcher Esprit 100 or similar is best for beginner to intermediate imagers. This apochromatic refractor produces images with a flat field, with excellent color correction.
At 550mm focal length, this telescope is much more forgiving in terms of tracking accuracy for astrophotography than one in the 1500mm+ range.
Unfortunately, many amateur astrophotographers will start with a large telescope that provides deep views, only to find that this method has a steep learning curve that only the most dedicated imagers will overcome!
The Capturing Process
IRAN ART EXHIBITION: Astrophotography involves some really long exposures. In daytime photography, a 5-second exposure using a filter, low ISO, and f/22 can create some incredible landscape images. This can capture movement such as flowing water and passing clouds.
In astrophotography, we use ultra-long exposures to capture dim objects in space. I’m talking exposures of 3-4 minutes each or longer.
As the sensor records the light entering the camera, it collects much more detail than our naked eye could ever see. As well as faint details of galaxy spiral arms and nebulosity, we are also able to record the intense color of the gasses, dust, and stars in space.
Signal-to-Noise Ratio
To produce detailed images of these DSO’s (deep-sky objects), we need to increase the signal to noise ratio of the image. The signal is the light collected by the camera, and noise is – well you all know what camera noise is.
If you’ve ever spoiled an image in a low light situation because of noise – you should see what happens in a single astro image frame! This, of course, creates a lot of noise. To combat this, we can improve the signal to noise ratio by stacking several images together.
The signal (the light in our DSO) continues to layer on top of each other, yet the noise falls in random patterns and eventually cancels itself out. I use a software application called DeepSkyStacker to combine multiple image exposures together for final processing.
The feeling of seeing your precious image get smoother and smoother as you stack more and more data together is euphoric. Yes, I get a little geeky when it comes to improving the signal to noise ratio of my astrophotography images.
IRAN ART EXHIBITION: I hope you have enjoyed this how-to guide on astrophotography for beginners. With the right tools and a little patience, you too will be taking amazing images of our night sky.