IRAN ART EXHIBITION: HOW TO MAKE A LITHOGRAPH? LEARN HERE
1. Graining the stone
Once a stone has been printed from for the last time, it is necessary to re-grain the stone to remove the greasy image and enable the stone to be re-used. Graining removes the chemically processed top layer from the stone, exposing the fresh, unprocessed stone underneath.
Firstly, oil patch cleaner is applied to the stone, left on for no more than half an hour, and then scrubbed thoroughly with a scourer. Three grades of carborundum grit are then used – coarse, medium and fine. Coarse is used first to grain the majority of the image off. The stone is placed in a graining sink and wetted all over. Coarse carborundum is sprinkled on along with some ‘Vim’, and a small piece of litho stone is used to rub over the surface of the stone in a figure-of-eight motion.
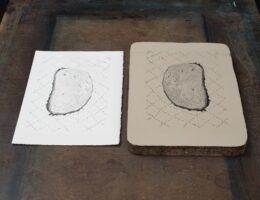
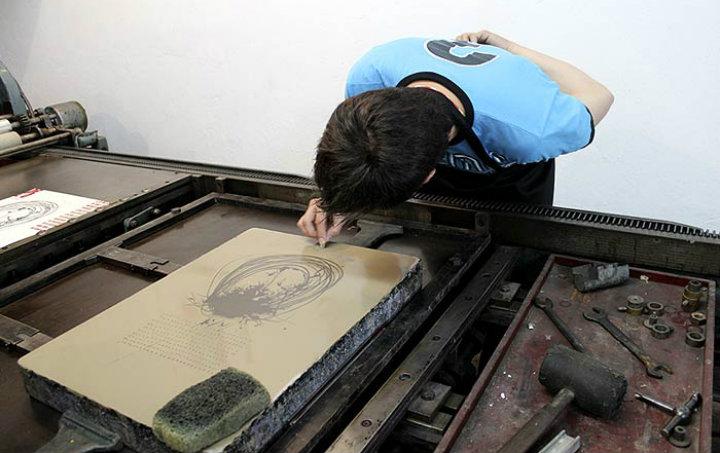
2. Drawing on the stone
There are a range of materials which can be used to draw and paint onto the stone surface, all of which contain grease, which absorbs into the top layer of the stone. Examples of which are lithographic crayons, rubbing block,(both ranging from hard to soft), and lithographic tusche, (grease suspended in water). Once processed, it is the drawn areas which will print.
When the drawing is finished, it is then dusted with french chalk – this helps to protect it during processing.
3. Processing the stone
The way in which the stone is processed depends entirely on the materials used to make the drawing, and the amount of grease in the stone.
The stone is processed using gum arabic, sometimes with a very small amount of nitric acid added. The purpose of the gum is to chemically separate the image and the non-image areas, so that the greasy image areas become water repellent or ‘hydrophobic’ and the non-image areas become water receptive or ‘hydrophilic’, so that when printed, only the image areas receive the ink and print. This chemical change happens in the very top layer of the and creates the ‘gum adsorb layer’ which is less then 1mm thick. Nitric acid is sometimes added to the gum in order to stop the grease in the stone from spreading. When nitric is used in the gum it referred to as an ‘etch’.
It is usually necessary to ‘etch’ the stone twice. The first etch is carefully applied to the stone with either a clean paintbrush or sponge. Once the whole stone is covered with gum, a clean sponge and then a clean rag are used to buff the gum down to a thin, even layer. Heat is then applied to dry the gum. The stone should then be covered and, importantly, left overnight to allow time for the gum to chemically change the stone and establish the image within the stone.
4. Washing out and rolling up
This step removes the drawing materials from the stone and replaces it with non drying black ink.
First the stone is re-gummed with plain gum, buffed down to a thin layer and dried. This helps to re-establish the image and non-image areas and thins the gum layer to ensure enough of the drawing material is removed.
Pure turpentine is then sprinkled and rubbed over the surface of stone – this dissolves and removes the greasy drawing materials.
The excess turps is wiped off with a cloth, and then a wet rag is used to remove the gum arabic from the first etch. A damp cloth is wiped over the stone in order to remove the excess
IRAN ART EXHIBITION: water but keep the stone surface damp. Non-drying black ink is then rolled onto the stone using a nap roller, until the image in the stone is clearly visible, re-damping the stone between rolls to keep the surface from drying out. Once the image is fully rolled up, the stone is then dried and dusted with french chalk, before a second gum arabic etch is applied. The gum etch is then buffed down to a thin layer and dried, and the stone should be left to rest for at least a few hours before proofing.
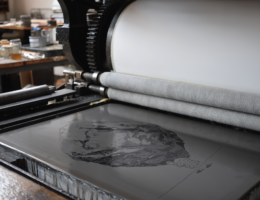
5. Printing the stone
When taking the first proofs from the stone, it is important to remember that the image will not print to its full potential until at least the 10th print – this is because the subtleties of the drawing will begin to show up after multiple inkings, so only after the stone has been thoroughly proofed is it possible to get a true idea of how the image will print.
First the stone is washed out and rolled up – as before. (The stone is gummed and dried, then washed out with turps, and then the gum washed off.)
While the stone is damp, greasy printing ink is rolled on using either a ‘nap’ or a ‘glazed’ roller. The first few proofs are usually taken onto newsprint, and after that damp paper is usually used to ensure the maximum amount of detail is picked up from the stone. The paper is laid onto the stone, and a few sheets of newsprint packing laid on top. The stone and paper are then rolled through the direct transfer press, and the paper is then pulled back from the stone to reveal the printed image.