IRAN ART EXHIBITION: ARE YOU READY FOR UNDERWATER MACRO PHOTOGRAPHY?
Equipment for Underwater Macro Photography
Macro Lenses
If you are shooting with a compact camera, you don’t have to worry about switching lenses, because your lens is fixed. For micro-four thirds shootes, the Panasonic 45mm macro lens or the Olympus 60mm macro lens will be your best choices. If you are shooting Sony APC-S sensor size or full frame, like a Sony A6500 or a Sony A7r III, you can use the Sony 50mm macro lens, or the Sony 90mm macro lens – I prefer the 90mm.
For cropped-sensor DSLR shooters, you can use a 60mm or 100/105mm macro lens. The 60mm macro lens is easier to start off with. If you are using a full-frame DSLR camera like a Nikon D850 or a Canon 5D Mark IV, then you will want to use the Nikon 105mm VR macro lens, or the Canon 100mm macro lens.
Strobes / Video Lights
Although you can use your internal flash for macro subjects, I strongly recommend getting one or two strobes. One is ok, but two is better as it will be easier to reduce backscatter and reduce shadows. Some people will also decide to get a powerful video light instead, as it allows them to use automatic exposure modes. The downside is that it limits you to very close subjects, and you have the possibility of camera shake blur.
Wet Diopters
To advance in your underwater macro photography, I consider a wet diopter, also known as a wet macro lens, a must-have piece of underwater photo equipment. They usually screw onto the end of your port, although there are flip-adapters and bayonet adapters available for certain underwater housings. Diopters come in different strengths, although more powerful is not always better, as the stronger diopters are more difficult to use. If just starting out, I would get a +5, +6 or +7 wet diopter.
Subject – choosing a macro subject
Taking great macro underwater photos starts with research. Where can I find good subjects? What dive sites and what depths are they at? Will I need a wet macro lens? Do searches on the internet, ask divers who have been there before. If possible, use a guide who specialized in macro subjects. Next, look at photos that have been taken at these locations. What subjects are producing the best photographs, which backgrounds and compositions look the best, what can you improve on. Try to previsualize the shots you would like to get, image how the light should fall on your subject, whether the background will be blurred or in focus. Based on your research, and imagined shots, decide on which lens or lenses to take on your dives.
IRAN ART EXHIBITION: When you start your dive, you should have an idea of what you are looking for, the type of habitat it lives in, and what depth ranges it is at. so you find a subject, now what?
If another photographer is shooting the subject, be careful not to get too close, or to cause silt to flow towards them. Keep your distance; watch the direction of the current and your silt. Try to get in their line of vision so they know you are often interested. See if there is another subject nearby you can shoot while waiting for them.
You must be able to evaluate the potential of a subject. Some subjects you will want to pass over because there is no chance of a good moment or presentation. This is something that comes with experience.
Moment – when to take the photo
To get good at underwater macro photography, it’s time to think about moment and presentation. You want to watch your subject. What is it doing, will it exhibit any behavior? Does it change position, yawn, or ambush fish? Is it carrying eggs? Opening / closing its mouth? Try to imagine what the best possible moment to capture will be. Sometimes the subject will be a beautiful slow-moving nudibranch all by itself. You may think there is no good or bad moment for this subject. But even for a nudibranch, there is often a best moment, when its gills are fully out, if it has gills.
Presentation – Composition, lighting, and focus in underwater macro photography
IRAN ART EXHIBITION: I want to capture the subject in the best possible presentation. I will think about 6 things – composition, strobe position (lighting), background, focus, exposure, and depth of field.
Composition – I will try to get low, and evaluate different compositions, such as head on, fill the frame, diagonal, shoot from underneath. Sometimes the best composition can really take work. Try a few different compositions.
Strobe position – based on the texture of the subject, and the water visibility, I will think about my strobe position. Do I want front lighting, side lighting, backlighting do i have to worry about backscatter Do I need to position my strobes for a black background? I almost always have my diffusers on, giving the light a softer look that looks better in macro photography.
Background – what color do I want my background to be? Do I want it black, blue, green? Is it in focus or blurred? Is there a colorful object nearby that I can get into the background? Do I need to carefully move the subject to a better background, and can that be done without stressing the subject? Sometimes lembeh sticks are used to carefully reposition crabs or shrimps. don’t use your dive gloves, they may injure or stick to the subject. Do not risk injuring a subject or causing it to flee its habitat just to get the shot you want.
Focus – you will want to usually focus on the eyes or rhinophores. Lock focus on them and recompose. If your camera has a moveable focus point, use your arrow keys to move your focus point to where you want it. You may need to do this often if the composition changes, or your subject moves. this will help avoid a bull’s-eye composition also. Depending on the subject and how easily my camera is focusing, I will switch between C (continuous) and S (single-shot) focus modes. Luckily my housing allows me access to this switch. C mode allows me to shoot without the camera “locking” focus, which can be difficult when shooting supermacro.
To keep the eyes of this goby on the left in focus, I moved my focus point to where I wanted it, and moved in quickly for the shot, keeping the focus point on its eye.
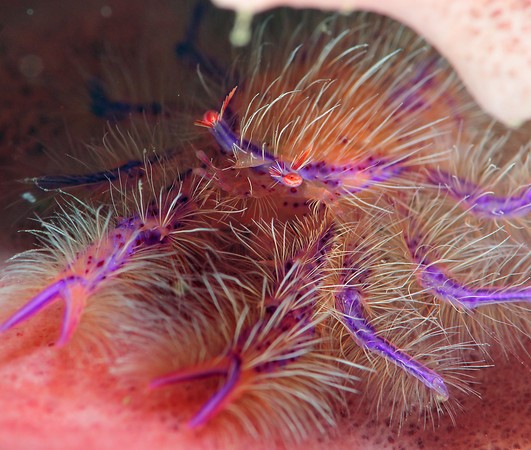
Exposure – you need to check your display and/or histogram to ensure a proper exposure. With my TTL converter I almost always have a proper exposure, but sometimes I’ll need to adjust my TTL converter up or down. If you are shooting manual, you’ll adjust your strobe power up or down. A TTL converter is a big help in shooting macro. You really don’t need to worry about exposure the majority of the time. I think people shooting macro without TTL are at a big disadvantage.
Depth of field – this is related to the background. How much DOF do I need, or want, for the composition that I have chosen? Do I want to blur the background? Is the ambient light so strong I need a small aperture to help block it out? (This is common in clear, shallow water at mid-day). All these factors will help determine the proper f-stop to use for the shot. Review the f-stop and depth of field examples if you need to. Remember – there is no best F-stop for macro photography. A large aperture (small f-stop) will blur the background, and a small aperture will bring more of the background into focus.
IRAN ART EXHIBITION: Take your time, think carefully about these items, and don’t forget to check your LCD. The better you become as a photographer, in general you will spend more time with subjects you feel are special, waiting for the right moment, and experimenting with your presentation.
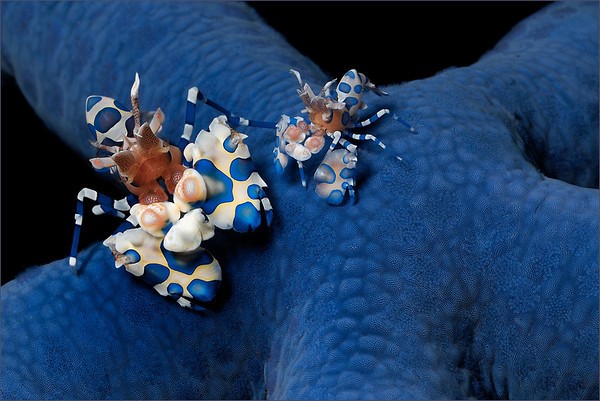
After finding a unique subject for underwater macro photography, it was perfectly presented showing just enough of its habitat to convey the sense of camoflauge it has developed. Portrait composition, slight diagonal line and black groundground all helped it come together.
After the shot, underwater etiquette
If there was another photographer waiting for the subject, find the photographer. Show them exactly where the subject is before leaving the scene. if the subject is very small, you may need to show them on the viewfinder first. Be careful that you don’t loose the location of a subject; this is where a lembeh stick will come in handy. Plant the lembeh stick next to the subject, so you can retrieve another photographer and bring them to the exact location. Your lembeh stick can also be used to stick in the ground when a current is sweeping you towards another dive taking a photograph. This way you can stay out of the way without kicking up silt.
